Thursday 10 December 2009

Is it a bird? No, its a plane!


Today I created an aeroplane in 3D Max.
I started by creating the body with a cylinder. I then selected polygons on one of its faces and extruded them and repeated it to give it its pointed nose shape. I then extruded some more polygons along the body to give it its wings. But before I did that I Tapered the model to give it its more rounded triangle look.
I continued to extrude and move vertex to create a wing and a tail fin on the plane.
After I created the wing and finished the tail of the ship, I then created a cylinder and copied it twice so I had 3 cylinders. I then moved the cylinders on top of the wing to so it looks like it has 3 engines.
The final stages were probably the most difficult - deleting half of the model by deleting the vertexes. I then copied the half and mirrored it so I could attatch it to the main first part.
Finally I selected vertexes and moved them close enough to weld them together to make a full soilid model - with exception to the back end of the ship where there is still a small hole.

Thursday 5 November 2009

Mr Roboto


Mr Roboto is alive!..... well, nearly alive.
Today, I started to build a robot is 3D Max using all that I have learnt about so far - box moddeling, using standard primitives and extended primitives. Editable meshes and modifiers.
The 2 images above show the head of the robot as well as its neck and part of its upper torso. Also you can notice that I extruded parts of it so that it looks like it has ears and eyes. The hardest part of making the model so far was when i was extruding the edges and ahd to get help whith adding vertexes and joining them up so it covered the holes.
Below you can see where I added a section on top of its head. I extruded two a point on its head and as the object was mirrored i also did it on the opposite side. I then added a Torus Knot in between teh two extruded points. What I forgot was that the object was mirrored and it added and extra knot. Luckily it turned out alright.
The two images below show that I created a cylinder and bent it before attatching it to the main body of the robot. Again because the object is mirrored, it created an arm on teh opposite side. I then created a pyramid and resized it so that it would fit on the end of the robots arms to make a type of hand/spike for it. I also extended the body of the robot so it now goes down to about its waist height.


To complete the model I would say I would need a couple of hours to finish it off. Nto because it would be difficult, but more because I still need to get used to all the controls and what the buttons do.

Wednesday 21 October 2009

Thursday 15 October 2009

Wallpaper Project Pt.2 - Fonts

For this section I had to research different styles of fonts and download 2 different ones that I could use in my wallpaper.Once I had the basic idea of what I wanted to do (I will post the basic ideas I drew in my next post) I looked on http://www.1001freefonts.com/ for the fonts. This website has many sections - Gothic, Horror, Asian etc and each of those sectioons has different fonts within them.
Looking through the different sections I found there was many fonts I liked and thought there might be a chance I could use them. The following images are of my research on teh website, some of the fonts in the images do stand a good chance at being used in my wallpaper.


The image above shows a few examples of different fonts from the Gothic section. The first font show "A Charming Font" is my favourite font out of them all - including those from the other sections - and will most liely be used in my wallpaper.

The image above show example from two other sections - Horror and Greek/Roman.
I like the horror style fonts as it suits in with how my wallpaper will look - a gothic/horror theme. (Which I think is appropriate with it getting so close to Halloween :D )
I also find the Greek/Roman style fonts interesting too, particulalry seeing as how the fonts in the image are more in the style of the Norse so I think that is a mistake on the websites part. I have a strong interest in Norse mythology and history and find the font styles quite interesting.
Below in the final image is one last font from the Roman/Greek style called "YGGDRASIL" which when translated generally means Odins horse. In Norse mythology yggdrasil is The World Tree and is a central part in Norse mythology.
The final section of fonts comes from the section called Bitmap/Pixel. I thoguht fonts from this section would also be appropriate for the wallpaper because of their strong connection with media and games.

Wednesday 30 September 2009

The Desktop Wallpaper Project

In this project, I have to plan, design and create a desktop wallpaper which will be used around the college.
I started this project by creating a collage showing 4 differant genres - Horror, Sci-fi, War and Fantasy.


I made the collage by cutting out the images out of games magazines, 3D CGI magazines (EDGE) and stuck the cutouts on a size A3 piece of paper.

After making this, I looked at the current college wallpaper and made notes about it looking at its key aspects - icons, colours etc.


The image above shows the comments I made when I looked at the current wallpaper for the computers in the media suites. I commented on the number of icons, how they are arranged and the colours.

Once I made comments about the current wallpaper, I went on the internet and looked at other wallpapers and commented on them. I looked at a total of 4 other wallpapers - here is a sample of what I did.

Bioshock 2 wallpaper
For the Bioshock 2 wallpaper I commented about how it is a "Unique take on the world of Rapture" and that it has a unique artistic style. I also commented that it woulnd't really be appropriate for the whole college beause of its content - blood and demented imigary.

Happy Tree Friends wallpaper
For the Happy Tree Friend wallpaper I commented on things such as - the colour scheme and howw it makes the text and icons stand out. I mentioned about icon placement and the best places the icons could go. How the character shown is from a web animation, whcich would be appropriate from media and games groups, as well as for other people around the college.


Using the comments I made from looking at the differant wallpapers I made a Brainstorm to gather more ideas on what I could do with my wallpaper.


Thursday 24 September 2009

3d Name


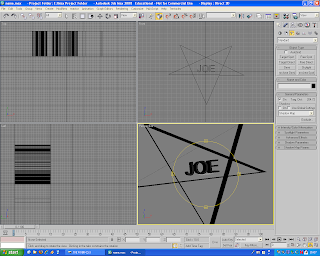
Today I created my name using 3D Max and used splines to create at pentragram and used Text to place my name in it. Once done, I joined both the text and the pentagram together. With both pieces joined I used modifiers to make the pentangle 3D from being 2D


3D Max - First time

Last week was the first time I used 3D Studio Max and in messing about getting used to it, here is what I created -

I was using the Standard Primitives to create basic shapes - Box, Sphere, Pyramids, Cones etc

Using these shapes I placed them as I saw fit to create my own landscape.


These are very basic renders of the 3D models I made. Below are my "artistic" shots of what I made :D


These images are the renders of what I created. They are my first steps in 3D design and modelling. Over the coming months we will see how my skills in 3D work improves and the things I create with those skill and tools.